
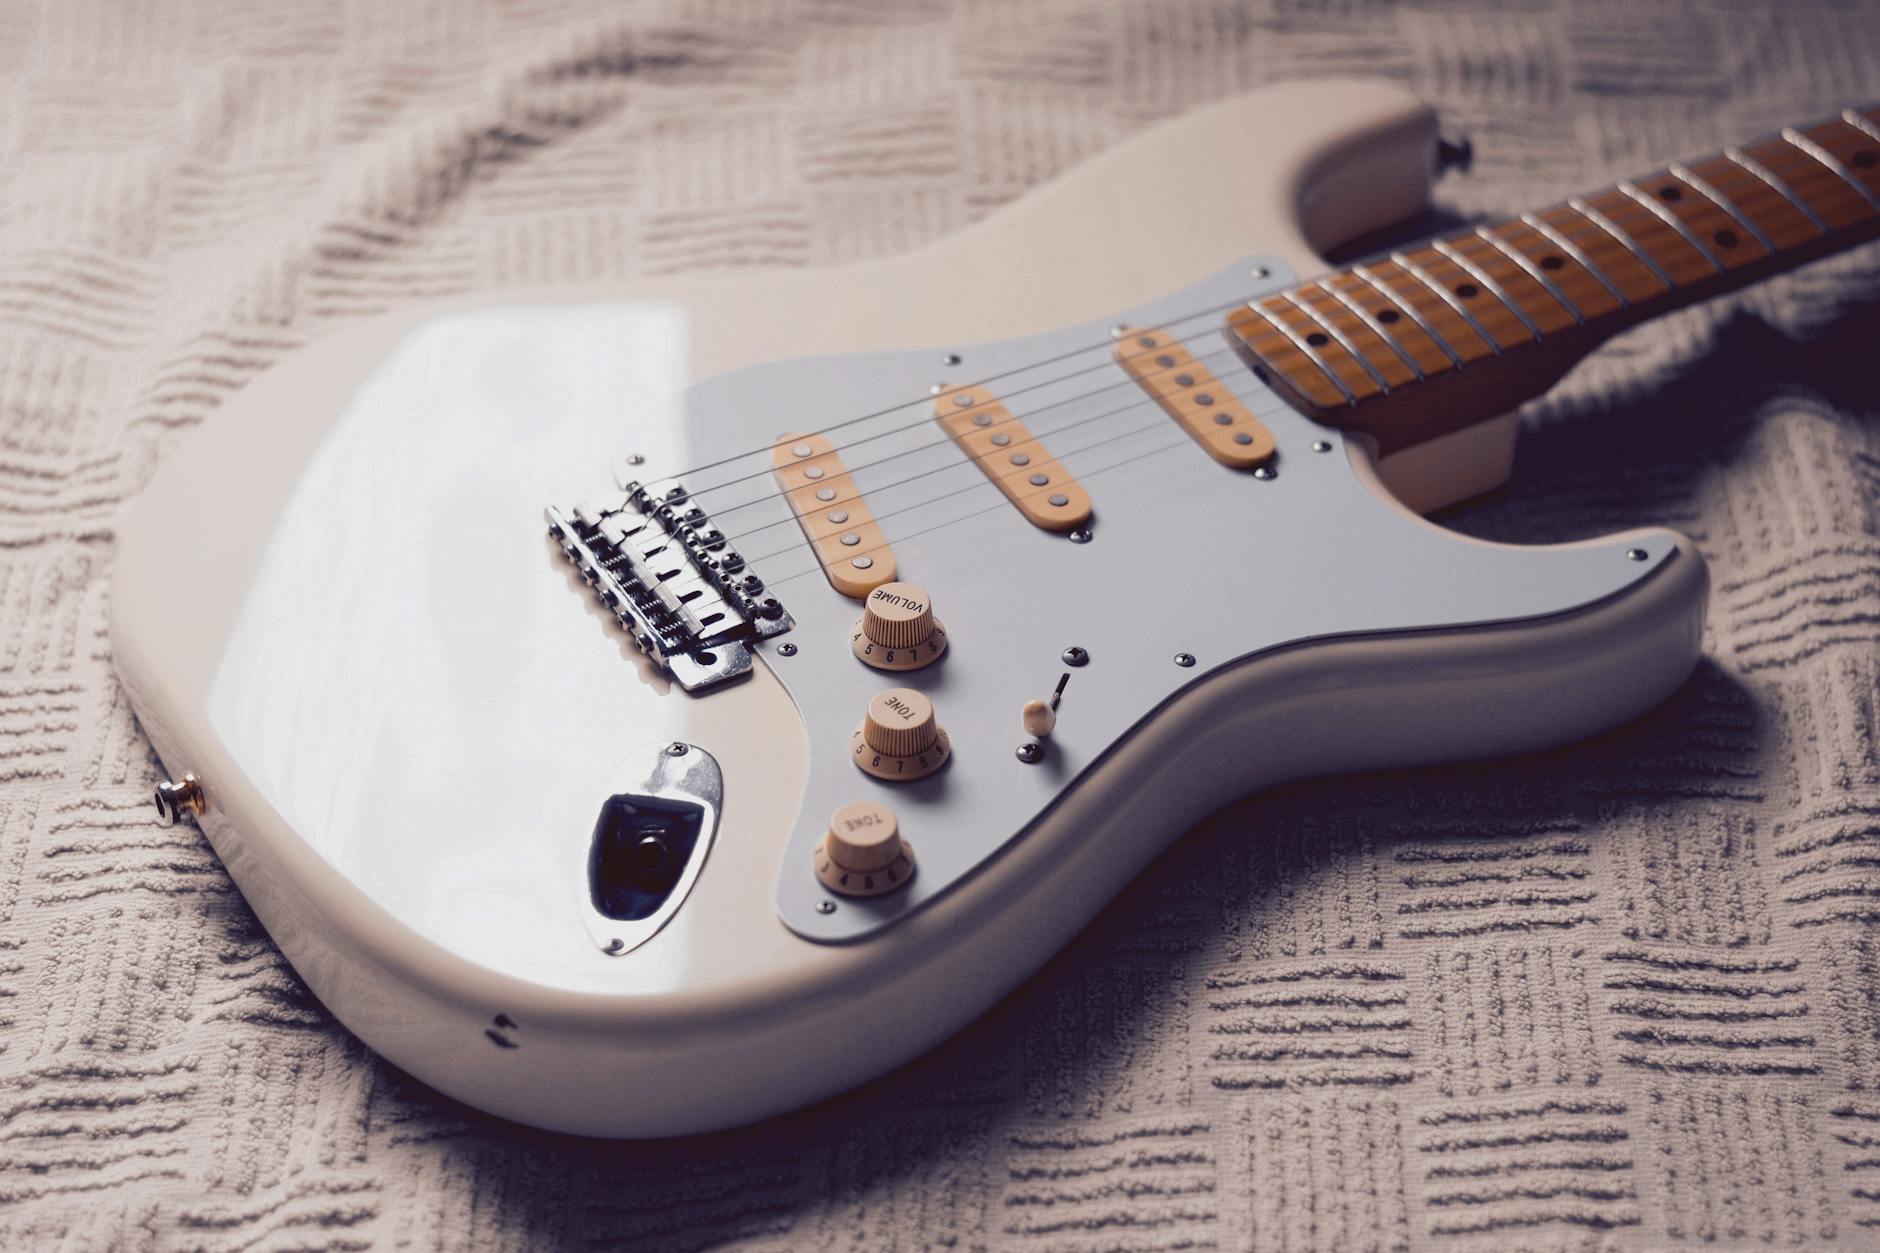
Alternate tunings can completely change the sound, feel, and harmonic possibilities of the guitar. Lowering or raising even one string can create new chord shapes, deeper bass notes, wider intervals, and open-string combinations that are difficult or impossible to achieve in standard tuning.
However, alternate tunings also make familiar chord diagrams less reliable.
A shape that produces one chord in standard tuning may produce something entirely different in Drop D, DADGAD, Open G, Open D, or another custom tuning. The visual fingering may look familiar, but the sounding notes have changed.
That means a chord diagram for an alternate tuning must be built and labeled using the actual tuning of the strings.
With FretGlyph, guitarists, teachers, songwriters, and publishers can create custom chord diagrams for alternate tunings, hear the resulting voicings, automatically identify likely chord names, and export the finished diagrams as PNG, JPG, or SVG files.
This guide explains how to create accurate guitar chord diagrams in alternate tunings, how tuning affects chord names, and how to organize diagrams for lessons, songwriting, books, and personal reference.
What Is an Alternate Guitar Tuning?
An alternate tuning is any tuning that differs from standard guitar tuning.
Standard tuning, from the sixth string to the first string, is:
- E
- A
- D
- G
- B
- E
In an alternate tuning, one or more of those open-string pitches are changed.
For example, Drop D lowers the sixth string from E to D:
- D
- A
- D
- G
- B
- E
DADGAD changes several strings:
- D
- A
- D
- G
- A
- D
Open G is commonly tuned:
- D
- G
- D
- G
- B
- D
These changes affect every fret on the altered strings.
A note played at the third fret of the sixth string is G in standard tuning. If the sixth string is lowered to D, the third fret becomes F.
Because of this, chord recognition, playback, and labeling must all use the correct tuning.
Why Guitarists Use Alternate Tunings
Alternate tunings are popular because they can make certain sounds and techniques easier to achieve.
They may provide:
- Lower bass notes
- Easier power chords
- Open-string drones
- Rich suspended harmony
- Easier slide-guitar shapes
- Symmetrical chord patterns
- Wider intervals
- New songwriting ideas
- Simpler fingerings
- Different resonance
Alternate tunings appear in many styles, including:
- Folk
- Blues
- Rock
- Metal
- Fingerstyle
- Celtic music
- Country
- Ambient music
- Experimental guitar
- Singer-songwriter music
A tuning can influence the entire character of a composition.
Why Standard Chord Diagrams Do Not Always Work
A chord diagram shows string and fret positions, but those positions only produce the expected notes when the tuning is correct.
For example, a familiar E major shape assumes the sixth string is tuned to E.
If that string is lowered to D and still played open, the chord contains D instead of E in the bass.
The resulting chord may sound like:
- E7/D
- A different inversion
- A suspended or extended voicing
- A chord with an unintended bass note
The shape has not changed, but the harmony has.
This is why alternate-tuning chord diagrams should always identify the tuning clearly.
Common Alternate Guitar Tunings
Before creating diagrams, it helps to understand several widely used tunings.
Drop D
Drop D tuning is:
- D
- A
- D
- G
- B
- E
Only the sixth string changes.
Drop D is popular in rock, metal, folk, and fingerstyle guitar because it provides a low D bass note and allows one-finger power chords across the lowest three strings.
DADGAD
DADGAD tuning is:
- D
- A
- D
- G
- A
- D
It creates an open, suspended sound and is widely associated with Celtic, folk, acoustic, and fingerstyle guitar.
The open strings do not form a simple major or minor chord. They create a D-based suspended sonority.
Open G
A common Open G tuning is:
- D
- G
- D
- G
- B
- D
When all strings are played open, they form a G major chord.
Open G is popular in blues, slide guitar, roots rock, and certain rock rhythm styles.
Some players avoid or remove the lowest string because the open sixth string is D rather than G.
Open D
Open D tuning is:
- D
- A
- D
- F#
- A
- D
The open strings form a D major chord.
This tuning works well for slide guitar, fingerstyle, folk, and open-string songwriting.
Open E
Open E tuning is:
- E
- B
- E
- G#
- B
- E
The open strings form E major.
It produces higher string tension than standard tuning, so some guitarists prefer to use Open D with a capo at the second fret.
Double Drop D
Double Drop D tuning is:
- D
- A
- D
- G
- B
- D
Both E strings are lowered to D.
This creates strong D drones in both the bass and treble.
Half-Step Down
Half-step-down tuning is:
- Eb
- Ab
- Db
- Gb
- Bb
- Eb
Every string is lowered by one semitone.
The visual chord shapes remain familiar, but every chord sounds one semitone lower than it would in standard tuning.
Full-Step Down
Full-step-down tuning is:
- D
- G
- C
- F
- A
- D
Every string is lowered by a whole step.
The shapes remain familiar, but the sounding chords are a full step lower.
Custom Tunings
Many guitarists create their own tunings.
A custom tuning may be designed around:
- A song’s key
- A particular drone note
- A vocal range
- A fingerstyle arrangement
- Extended bass range
- Symmetrical intervals
- An unusual chord
A flexible chord diagram creator should allow each string pitch to be entered manually.
Step 1: Identify the Exact Tuning
Before building any chord diagram, write down the tuning from the sixth string to the first string.
For example:
D A D G A D
Do not rely only on a tuning name.
Different players sometimes use similar names for slightly different tunings. Writing all six notes eliminates ambiguity.
When using FretGlyph, select a preset tuning or enter each open-string pitch manually.
Step 2: Confirm the String Order
Always enter tuning notes in the correct order.
Most guitar tools list strings from:
- Sixth string to first string
That means:
- Lowest-pitched string first
- Highest-pitched string last
However, some interfaces may display the first string first.
Confirm the order before continuing.
Entering the tuning backward will produce incorrect playback and chord names.
Step 3: Decide Whether the Diagram Shows Actual or Relative Frets
Most chord diagrams use actual fret numbers.
If a note appears at the third fret, the guitarist presses the third fret of the instrument.
However, capo-based diagrams may use positions relative to the capo.
For example, a diagram might treat the capo as a temporary nut and label the first fret above it as fret one.
Choose one system and explain it clearly.
For most standalone alternate-tuning diagrams, actual fret numbers are easiest to understand.
Step 4: Add the Chord Shape
Once the tuning is set, add the desired fretted notes.
For each string, choose one of the following:
- Fretted note
- Open string
- Muted string
- Unused string
Add the shape based on how the chord is actually played rather than how it resembles a standard-tuning chord.
Using the FretGlyph alternate-tuning chord creator, you can click the desired string and fret positions directly.
Step 5: Mark Every Open String Carefully
Open strings are especially important in alternate tunings.
Many alternate-tuning chords depend on drones and ringing open notes.
A single open string can determine whether the chord sounds:
- Major
- Minor
- Suspended
- Extended
- Dissonant
- Modal
Mark every intended open string with an O.
Do not leave the string status ambiguous.
Step 6: Mark Muted Strings
Not every open string in the tuning belongs in every chord.
A string may need to be muted because it:
- Creates the wrong bass note
- Conflicts with the chord quality
- Produces unwanted dissonance
- Makes the voicing too dense
- Interferes with the melody
Mark muted strings with an X.
This is particularly important in open tunings, where strumming all six strings may automatically produce the tuning’s home chord.
Step 7: Add Barres
Open tunings often make barre chords easier.
In Open G, for example, barring several strings at one fret can create a major chord.
In Open D, a full barre can also produce a movable major chord.
When adding a barre, specify:
- The fret
- The first string covered
- The last string covered
- The finger used
Do not automatically extend a barre across strings that should remain open or muted.
FretGlyph can be used to create full and partial barres in alternate tunings.
Step 8: Calculate the Sounding Notes
Each note must be calculated from the tuning and fret position.
Every fret raises the open-string note by one semitone.
For example, if a string is tuned to D:
- Open: D
- First fret: Eb or D#
- Second fret: E
- Third fret: F
- Fourth fret: F#
- Fifth fret: G
This calculation applies to every string.
Automatic chord recognition depends on the accuracy of these pitch calculations.
Step 9: Review the Automatic Chord Name
Once the notes are entered, FretGlyph can analyze the voicing and suggest a chord name.
This is useful because alternate-tuning shapes are often difficult to identify by sight.
The application may consider:
- All sounding notes
- The bass note
- Repeated notes
- The selected tuning
- Open strings
- Capo position
- Possible root notes
Review the suggested result rather than accepting it automatically.
Step 10: Check for Alternate Names
One alternate-tuning voicing may have several valid names.
For example, a group of notes could be interpreted as:
- Dsus2
- Asus4/D
- D5(add9)
- A chord with an omitted third
The best label depends on:
- The progression
- The melody
- The intended root
- The bass note
- The musical style
A chord tool should provide useful suggestions while allowing the musician to choose the final name.
Step 11: Override the Name When Necessary
Manual naming is particularly important in alternate tunings.
A tool may correctly identify the notes but choose a name that does not match the chord’s musical function.
Override the name when:
- Another root is intended
- The chord functions differently in the progression
- A simplified name is better for students
- The voicing uses omitted notes
- The diagram is part of a specific songwriting system
- The preferred enharmonic spelling differs
Once the manual name is entered, it should remain unchanged until automatic naming is intentionally restored.
Step 12: Play the Chord
Use playback to verify the voicing.
Listen for:
- Incorrect tuning
- Wrong fret positions
- Unwanted open strings
- An unexpected bass note
- Excessive dissonance
- Notes that do not match the name
Playback is especially valuable in alternate tunings because familiar visual patterns may produce unfamiliar sounds.
You can compare the sound from FretGlyph with your guitar.
Step 13: Test the Shape on a Real Guitar
A digitally valid chord is not always physically comfortable.
Play the chord on the actual instrument and check:
- Finger reach
- String tension
- Barre difficulty
- Hand position
- Accidental muting
- Transition to nearby chords
- Whether open strings ring clearly
Alternate tunings may change string tension, especially when several strings are lowered or raised.
A shape that looks practical on a diagram may feel different on the instrument.
Step 14: Add Finger Numbers
Finger numbers can help clarify unfamiliar shapes.
Use:
- 1 for index finger
- 2 for middle finger
- 3 for ring finger
- 4 for little finger
- T for thumb when needed
Finger numbers are especially helpful for:
- Students
- Partial barres
- Fingerstyle voicings
- Large stretches
- Shapes involving open strings
- Chord transitions
Advanced players may prefer diagrams without finger numbers.
Step 15: Label the Tuning on the Diagram or Chart
Never publish an alternate-tuning chord diagram without identifying the tuning.
The tuning can appear:
- Above the diagram
- Below the title
- In a chart header
- In a caption
- At the beginning of a book chapter
- In a legend
Use the complete tuning rather than only the tuning name when possible.
For example:
Tuning: D A D G A D
This prevents confusion and makes the diagram usable outside its original context.
Creating Chord Diagrams in Drop D
Drop D is one of the easiest alternate tunings to work with because only the sixth string changes.
The tuning is:
- D
- A
- D
- G
- B
- E
Most standard chord shapes remain similar as long as the sixth string is muted.
The biggest changes occur when the sixth string is included.
Drop D Power Chords
The lowest three strings in Drop D are tuned:
- D
- A
- D
At the same fret, these strings form a root, fifth, and octave.
This allows one-finger power chords.
To diagram a Drop D power chord:
- Set the tuning to Drop D.
- Place a barre across the sixth, fifth, and fourth strings.
- Mute the upper strings when needed.
- Label the chord according to the sixth-string root.
- Add finger 1 to the barre.
- Play the chord to confirm it.
At the fifth fret, this produces G5.
Drop D Open D Chords
The low open D can strengthen chords based on D.
A standard open D major shape can include the sixth string in Drop D, producing a fuller bass.
The diagram should show both the sixth and fourth strings as open.
Automatic naming should recognize D as the root rather than treating the low note as an inversion.
Creating Chord Diagrams in DADGAD
DADGAD tuning is:
- D
- A
- D
- G
- A
- D
The open strings create a suspended D-based sonority.
This tuning is well suited to:
- Drones
- Modal harmony
- Celtic accompaniment
- Fingerstyle arrangements
- Open-string chord extensions
Naming DADGAD Chords
Chord names in DADGAD can be ambiguous because the open strings frequently add:
- Suspensions
- Ninths
- Fourths
- Fifths
- Repeated roots
A shape that functions as G major may contain open A and D strings, creating a name such as:
- Gadd9
- Gsus2
- G6/9 without a third
- A slash-chord interpretation
Use the name that best matches the musical function.
Creating DADGAD Diagrams
When creating DADGAD diagrams:
- Set all six open notes correctly.
- Decide which drones should remain open.
- Mute any open strings that conflict with the chord.
- Review the bass note.
- Check whether the third is present.
- Listen to the playback.
- Override the automatic name when necessary.
The absence of a third may make the chord harmonically flexible.
Creating Chord Diagrams in Open G
Open G tuning is commonly:
- D
- G
- D
- G
- B
- D
The open strings form G major.
A full barre across the appropriate strings can create movable major chords.
For example:
- Open: G major
- Fifth fret: C major
- Seventh fret: D major
- Twelfth fret: G major
Five-String Open G
Some players avoid the lowest D string and treat the fifth string as the primary bass.
This is common in certain rock and blues styles.
When creating the diagram:
- Mark the sixth string muted if it should not sound.
- Begin the chord from the fifth string.
- Confirm the bass note.
- Avoid assuming all six strings should be included.
Open G Slide Chords
Slide guitar often uses straight barres across several strings.
A diagram can show:
- The fret
- The strings played
- Muted lower strings
- Optional melody notes
- The chord name
Playback can help confirm whether the voicing contains the desired root and chord quality.
Creating Chord Diagrams in Open D
Open D tuning is:
- D
- A
- D
- F#
- A
- D
The open strings form D major.
A full barre creates movable major chords.
For example:
- Open: D
- Second fret: E
- Third fret: F
- Fifth fret: G
- Seventh fret: A
Minor Chords in Open D
Because the open tuning contains a major third, minor chords often require changing or avoiding the F# string.
A minor voicing may need:
- F natural instead of F#
- The third string muted
- A partial barre
- A custom fingering
This is a good example of why each string must be marked accurately.
Creating Diagrams for Half-Step-Down Tuning
Half-step-down tuning is:
- Eb
- Ab
- Db
- Gb
- Bb
- Eb
The visual chord shapes remain the same as standard tuning, but every chord sounds one semitone lower.
For example:
- E shape sounds as Eb
- A shape sounds as Ab
- G shape sounds as Gb
- D shape sounds as Db
A diagram may show:
- Shape name
- Sounding chord
- Tuning
Decide whether the main chord label should represent the shape or actual sound.
For ensemble and publishing purposes, the sounding chord is usually more useful.
Creating Diagrams for Full-Step-Down Tuning
Full-step-down tuning lowers every string by two semitones:
- D
- G
- C
- F
- A
- D
Standard shapes sound one whole step lower.
For example:
- E shape sounds as D
- G shape sounds as F
- C shape sounds as Bb
- A shape sounds as G
Automatic chord naming should reflect the sounding notes.
Using a Capo with Alternate Tunings
A capo can be used in any tuning.
For example, Open D with a capo at the second fret produces Open E pitches while maintaining the lower string tension of Open D.
When using a capo:
- Set the alternate tuning.
- Enter the capo fret.
- Build the chord shape.
- Calculate the sounding notes.
- Display both relative shape and sounding name when useful.
The order matters. The tuning is established first, and the capo raises every string from that starting point.
How to Organize Alternate-Tuning Chord Charts
A chart should clearly identify the tuning and organize related shapes.
Possible categories include:
- Open chords
- Major chords
- Minor chords
- Power chords
- Suspended chords
- Seventh chords
- Movable barres
- Song-specific voicings
- Chords by root note
With FretGlyph, you can create up to 16 diagrams in one project.
Name projects clearly, such as:
- DADGAD Chords in D
- Open G Slide Shapes
- Drop D Power Chords
- Open D Song Voicings
Alternate-Tuning Charts for Guitar Teachers
Teachers should introduce alternate tunings with clear context.
A student chart might include:
- The tuning
- A string-by-string tuning guide
- Three or four basic chords
- Root-note locations
- A short progression
- Practice instructions
- A reminder that standard chord shapes may sound different
Do not overload a beginner with too many unfamiliar shapes at once.
Alternate-Tuning Diagrams for Songwriters
Songwriters often use alternate tunings to discover new harmony.
A useful workflow is:
- Choose a tuning.
- Experiment with open strings.
- Save interesting shapes in FretGlyph.
- Listen to playback.
- Review possible chord names.
- Add manual labels when needed.
- Arrange the shapes into a progression.
- Export or save the project.
The diagram preserves the exact fingering, which may be difficult to remember later.
Alternate-Tuning Diagrams for Guitar Books
Authors should establish a consistent notation system.
Decide:
- Where tuning labels appear
- Whether chord names represent shapes or sounding harmony
- How capo information is displayed
- Whether note names or finger numbers are shown
- How open drones are marked
- Which enharmonic spellings are used
SVG export is usually the strongest choice for print because it remains sharp when resized.
Choosing Sharps or Flats
Alternate tunings may create chords that can be spelled in several ways.
For example:
- F# or Gb
- C# or Db
- G# or Ab
Choose spellings based on:
- The key
- The root note
- The progression
- The book or project’s style guide
A progression in D major will usually use F# rather than Gb.
A progression in Eb major will usually use Ab rather than G#.
Common Alternate-Tuning Diagram Mistakes
Forgetting to change the tuning
This produces incorrect playback and chord names.
Entering the strings backward
Confirm whether the interface begins with the sixth or first string.
Leaving open strings active unintentionally
Alternate tunings often contain strong drone notes that can change the chord.
Using a standard-tuning chord name
The same shape may produce different notes.
Omitting the tuning label
The diagram may be impossible to interpret correctly.
Ignoring the bass note
A lowered string may create a slash chord or inversion.
Accepting the first automatic name without review
Alternate-tuning chords often have multiple valid interpretations.
Using impractical fingerings
Test every shape on a real guitar.
Forgetting capo transposition
Playback and naming must account for the capo.
How to Check an Alternate-Tuning Diagram
Before exporting, confirm:
- The tuning is correct.
- The string order is correct.
- The capo position is correct.
- The starting fret is visible.
- Every fretted note is accurate.
- Open strings are intentional.
- Muted strings are marked.
- Barres cover the correct strings.
- The bass note is correct.
- The chord name matches the musical context.
- The fingering is playable.
- Playback sounds correct.
- The tuning is displayed with the diagram.
- The export file is clear.
This checklist is especially important for published or educational materials.
Exporting Alternate-Tuning Chord Diagrams
Choose the export format based on the project.
PNG
Use PNG for:
- Online lessons
- Websites
- Social media
- Presentations
- Digital worksheets
- Transparent graphics
JPG
Use JPG for:
- Basic image sharing
- Solid backgrounds
- Platforms that do not accept SVG
SVG
Use SVG for:
- Guitar books
- Professional printing
- Large diagrams
- Vector editing
- Scalable website graphics
FretGlyph allows users to create and export diagrams in multiple formats.
Why Use FretGlyph for Alternate Tunings?
FretGlyph is designed to support more than standard open chords.
Users can:
- Select preset tunings
- Enter custom string pitches
- Create open and fretted notes
- Mark muted strings
- Add full and partial barres
- Set a capo
- Automatically identify likely chord names
- Review alternate names
- Override chord labels
- Play the actual sounding voicing
- Organize up to 16 diagrams
- Export PNG, JPG, or SVG files
This makes it useful for guitarists working in Drop D, DADGAD, Open G, Open D, lowered tunings, and custom setups.
Start Creating Chord Diagrams in Alternate Tunings
Accurate alternate-tuning chord diagrams begin with the correct open-string pitches.
Once the tuning is set, every fret, open string, bass note, chord name, and playback pitch can be calculated properly.
Mark all open and muted strings clearly, review automatic naming carefully, and use manual overrides when the musical context requires a different label.
Always identify the tuning alongside the diagram and test the shape on a real guitar before publishing it.
Whether you are documenting a songwriting idea, creating a lesson, preparing a guitar book, or building a personal chord library, FretGlyph can help you create, hear, organize, and export alternate-tuning chord diagrams.
Visit FretGlyph to create guitar chord diagrams in alternate tunings.
Alternate tunings can completely change the sound, feel, and harmonic possibilities of the guitar. Lowering or raising even one string can create new chord shapes, deeper bass notes, wider intervals, and open-string combinations that are difficult or impossible to achieve in standard tuning.
However, alternate tunings also make familiar chord diagrams less reliable.
A shape that produces one chord in standard tuning may produce something entirely different in Drop D, DADGAD, Open G, Open D, or another custom tuning. The visual fingering may look familiar, but the sounding notes have changed.
That means a chord diagram for an alternate tuning must be built and labeled using the actual tuning of the strings.
With FretGlyph, guitarists, teachers, songwriters, and publishers can create custom chord diagrams for alternate tunings, hear the resulting voicings, automatically identify likely chord names, and export the finished diagrams as PNG, JPG, or SVG files.
This guide explains how to create accurate guitar chord diagrams in alternate tunings, how tuning affects chord names, and how to organize diagrams for lessons, songwriting, books, and personal reference.
What Is an Alternate Guitar Tuning?
An alternate tuning is any tuning that differs from standard guitar tuning.
Standard tuning, from the sixth string to the first string, is:
- E
- A
- D
- G
- B
- E
In an alternate tuning, one or more of those open-string pitches are changed.
For example, Drop D lowers the sixth string from E to D:
- D
- A
- D
- G
- B
- E
DADGAD changes several strings:
- D
- A
- D
- G
- A
- D
Open G is commonly tuned:
- D
- G
- D
- G
- B
- D
These changes affect every fret on the altered strings.
A note played at the third fret of the sixth string is G in standard tuning. If the sixth string is lowered to D, the third fret becomes F.
Because of this, chord recognition, playback, and labeling must all use the correct tuning.
Why Guitarists Use Alternate Tunings
Alternate tunings are popular because they can make certain sounds and techniques easier to achieve.
They may provide:
- Lower bass notes
- Easier power chords
- Open-string drones
- Rich suspended harmony
- Easier slide-guitar shapes
- Symmetrical chord patterns
- Wider intervals
- New songwriting ideas
- Simpler fingerings
- Different resonance
Alternate tunings appear in many styles, including:
- Folk
- Blues
- Rock
- Metal
- Fingerstyle
- Celtic music
- Country
- Ambient music
- Experimental guitar
- Singer-songwriter music
A tuning can influence the entire character of a composition.
Why Standard Chord Diagrams Do Not Always Work
A chord diagram shows string and fret positions, but those positions only produce the expected notes when the tuning is correct.
For example, a familiar E major shape assumes the sixth string is tuned to E.
If that string is lowered to D and still played open, the chord contains D instead of E in the bass.
The resulting chord may sound like:
- E7/D
- A different inversion
- A suspended or extended voicing
- A chord with an unintended bass note
The shape has not changed, but the harmony has.
This is why alternate-tuning chord diagrams should always identify the tuning clearly.
Common Alternate Guitar Tunings
Before creating diagrams, it helps to understand several widely used tunings.
Drop D
Drop D tuning is:
- D
- A
- D
- G
- B
- E
Only the sixth string changes.
Drop D is popular in rock, metal, folk, and fingerstyle guitar because it provides a low D bass note and allows one-finger power chords across the lowest three strings.
DADGAD
DADGAD tuning is:
- D
- A
- D
- G
- A
- D
It creates an open, suspended sound and is widely associated with Celtic, folk, acoustic, and fingerstyle guitar.
The open strings do not form a simple major or minor chord. They create a D-based suspended sonority.
Open G
A common Open G tuning is:
- D
- G
- D
- G
- B
- D
When all strings are played open, they form a G major chord.
Open G is popular in blues, slide guitar, roots rock, and certain rock rhythm styles.
Some players avoid or remove the lowest string because the open sixth string is D rather than G.
Open D
Open D tuning is:
- D
- A
- D
- F#
- A
- D
The open strings form a D major chord.
This tuning works well for slide guitar, fingerstyle, folk, and open-string songwriting.
Open E
Open E tuning is:
- E
- B
- E
- G#
- B
- E
The open strings form E major.
It produces higher string tension than standard tuning, so some guitarists prefer to use Open D with a capo at the second fret.
Double Drop D
Double Drop D tuning is:
- D
- A
- D
- G
- B
- D
Both E strings are lowered to D.
This creates strong D drones in both the bass and treble.
Half-Step Down
Half-step-down tuning is:
- Eb
- Ab
- Db
- Gb
- Bb
- Eb
Every string is lowered by one semitone.
The visual chord shapes remain familiar, but every chord sounds one semitone lower than it would in standard tuning.
Full-Step Down
Full-step-down tuning is:
- D
- G
- C
- F
- A
- D
Every string is lowered by a whole step.
The shapes remain familiar, but the sounding chords are a full step lower.
Custom Tunings
Many guitarists create their own tunings.
A custom tuning may be designed around:
- A song’s key
- A particular drone note
- A vocal range
- A fingerstyle arrangement
- Extended bass range
- Symmetrical intervals
- An unusual chord
A flexible chord diagram creator should allow each string pitch to be entered manually.
Step 1: Identify the Exact Tuning
Before building any chord diagram, write down the tuning from the sixth string to the first string.
For example:
D A D G A D
Do not rely only on a tuning name.
Different players sometimes use similar names for slightly different tunings. Writing all six notes eliminates ambiguity.
When using FretGlyph, select a preset tuning or enter each open-string pitch manually.
Step 2: Confirm the String Order
Always enter tuning notes in the correct order.
Most guitar tools list strings from:
- Sixth string to first string
That means:
- Lowest-pitched string first
- Highest-pitched string last
However, some interfaces may display the first string first.
Confirm the order before continuing.
Entering the tuning backward will produce incorrect playback and chord names.
Step 3: Decide Whether the Diagram Shows Actual or Relative Frets
Most chord diagrams use actual fret numbers.
If a note appears at the third fret, the guitarist presses the third fret of the instrument.
However, capo-based diagrams may use positions relative to the capo.
For example, a diagram might treat the capo as a temporary nut and label the first fret above it as fret one.
Choose one system and explain it clearly.
For most standalone alternate-tuning diagrams, actual fret numbers are easiest to understand.
Step 4: Add the Chord Shape
Once the tuning is set, add the desired fretted notes.
For each string, choose one of the following:
- Fretted note
- Open string
- Muted string
- Unused string
Add the shape based on how the chord is actually played rather than how it resembles a standard-tuning chord.
Using the FretGlyph alternate-tuning chord creator, you can click the desired string and fret positions directly.
Step 5: Mark Every Open String Carefully
Open strings are especially important in alternate tunings.
Many alternate-tuning chords depend on drones and ringing open notes.
A single open string can determine whether the chord sounds:
- Major
- Minor
- Suspended
- Extended
- Dissonant
- Modal
Mark every intended open string with an O.
Do not leave the string status ambiguous.
Step 6: Mark Muted Strings
Not every open string in the tuning belongs in every chord.
A string may need to be muted because it:
- Creates the wrong bass note
- Conflicts with the chord quality
- Produces unwanted dissonance
- Makes the voicing too dense
- Interferes with the melody
Mark muted strings with an X.
This is particularly important in open tunings, where strumming all six strings may automatically produce the tuning’s home chord.
Step 7: Add Barres
Open tunings often make barre chords easier.
In Open G, for example, barring several strings at one fret can create a major chord.
In Open D, a full barre can also produce a movable major chord.
When adding a barre, specify:
- The fret
- The first string covered
- The last string covered
- The finger used
Do not automatically extend a barre across strings that should remain open or muted.
FretGlyph can be used to create full and partial barres in alternate tunings.
Step 8: Calculate the Sounding Notes
Each note must be calculated from the tuning and fret position.
Every fret raises the open-string note by one semitone.
For example, if a string is tuned to D:
- Open: D
- First fret: Eb or D#
- Second fret: E
- Third fret: F
- Fourth fret: F#
- Fifth fret: G
This calculation applies to every string.
Automatic chord recognition depends on the accuracy of these pitch calculations.
Step 9: Review the Automatic Chord Name
Once the notes are entered, FretGlyph can analyze the voicing and suggest a chord name.
This is useful because alternate-tuning shapes are often difficult to identify by sight.
The application may consider:
- All sounding notes
- The bass note
- Repeated notes
- The selected tuning
- Open strings
- Capo position
- Possible root notes
Review the suggested result rather than accepting it automatically.
Step 10: Check for Alternate Names
One alternate-tuning voicing may have several valid names.
For example, a group of notes could be interpreted as:
- Dsus2
- Asus4/D
- D5(add9)
- A chord with an omitted third
The best label depends on:
- The progression
- The melody
- The intended root
- The bass note
- The musical style
A chord tool should provide useful suggestions while allowing the musician to choose the final name.
Step 11: Override the Name When Necessary
Manual naming is particularly important in alternate tunings.
A tool may correctly identify the notes but choose a name that does not match the chord’s musical function.
Override the name when:
- Another root is intended
- The chord functions differently in the progression
- A simplified name is better for students
- The voicing uses omitted notes
- The diagram is part of a specific songwriting system
- The preferred enharmonic spelling differs
Once the manual name is entered, it should remain unchanged until automatic naming is intentionally restored.
Step 12: Play the Chord
Use playback to verify the voicing.
Listen for:
- Incorrect tuning
- Wrong fret positions
- Unwanted open strings
- An unexpected bass note
- Excessive dissonance
- Notes that do not match the name
Playback is especially valuable in alternate tunings because familiar visual patterns may produce unfamiliar sounds.
You can compare the sound from FretGlyph with your guitar.
Step 13: Test the Shape on a Real Guitar
A digitally valid chord is not always physically comfortable.
Play the chord on the actual instrument and check:
- Finger reach
- String tension
- Barre difficulty
- Hand position
- Accidental muting
- Transition to nearby chords
- Whether open strings ring clearly
Alternate tunings may change string tension, especially when several strings are lowered or raised.
A shape that looks practical on a diagram may feel different on the instrument.
Step 14: Add Finger Numbers
Finger numbers can help clarify unfamiliar shapes.
Use:
- 1 for index finger
- 2 for middle finger
- 3 for ring finger
- 4 for little finger
- T for thumb when needed
Finger numbers are especially helpful for:
- Students
- Partial barres
- Fingerstyle voicings
- Large stretches
- Shapes involving open strings
- Chord transitions
Advanced players may prefer diagrams without finger numbers.
Step 15: Label the Tuning on the Diagram or Chart
Never publish an alternate-tuning chord diagram without identifying the tuning.
The tuning can appear:
- Above the diagram
- Below the title
- In a chart header
- In a caption
- At the beginning of a book chapter
- In a legend
Use the complete tuning rather than only the tuning name when possible.
For example:
Tuning: D A D G A D
This prevents confusion and makes the diagram usable outside its original context.
Creating Chord Diagrams in Drop D
Drop D is one of the easiest alternate tunings to work with because only the sixth string changes.
The tuning is:
- D
- A
- D
- G
- B
- E
Most standard chord shapes remain similar as long as the sixth string is muted.
The biggest changes occur when the sixth string is included.
Drop D Power Chords
The lowest three strings in Drop D are tuned:
- D
- A
- D
At the same fret, these strings form a root, fifth, and octave.
This allows one-finger power chords.
To diagram a Drop D power chord:
- Set the tuning to Drop D.
- Place a barre across the sixth, fifth, and fourth strings.
- Mute the upper strings when needed.
- Label the chord according to the sixth-string root.
- Add finger 1 to the barre.
- Play the chord to confirm it.
At the fifth fret, this produces G5.
Drop D Open D Chords
The low open D can strengthen chords based on D.
A standard open D major shape can include the sixth string in Drop D, producing a fuller bass.
The diagram should show both the sixth and fourth strings as open.
Automatic naming should recognize D as the root rather than treating the low note as an inversion.
Creating Chord Diagrams in DADGAD
DADGAD tuning is:
- D
- A
- D
- G
- A
- D
The open strings create a suspended D-based sonority.
This tuning is well suited to:
- Drones
- Modal harmony
- Celtic accompaniment
- Fingerstyle arrangements
- Open-string chord extensions
Naming DADGAD Chords
Chord names in DADGAD can be ambiguous because the open strings frequently add:
- Suspensions
- Ninths
- Fourths
- Fifths
- Repeated roots
A shape that functions as G major may contain open A and D strings, creating a name such as:
- Gadd9
- Gsus2
- G6/9 without a third
- A slash-chord interpretation
Use the name that best matches the musical function.
Creating DADGAD Diagrams
When creating DADGAD diagrams:
- Set all six open notes correctly.
- Decide which drones should remain open.
- Mute any open strings that conflict with the chord.
- Review the bass note.
- Check whether the third is present.
- Listen to the playback.
- Override the automatic name when necessary.
The absence of a third may make the chord harmonically flexible.
Creating Chord Diagrams in Open G
Open G tuning is commonly:
- D
- G
- D
- G
- B
- D
The open strings form G major.
A full barre across the appropriate strings can create movable major chords.
For example:
- Open: G major
- Fifth fret: C major
- Seventh fret: D major
- Twelfth fret: G major
Five-String Open G
Some players avoid the lowest D string and treat the fifth string as the primary bass.
This is common in certain rock and blues styles.
When creating the diagram:
- Mark the sixth string muted if it should not sound.
- Begin the chord from the fifth string.
- Confirm the bass note.
- Avoid assuming all six strings should be included.
Open G Slide Chords
Slide guitar often uses straight barres across several strings.
A diagram can show:
- The fret
- The strings played
- Muted lower strings
- Optional melody notes
- The chord name
Playback can help confirm whether the voicing contains the desired root and chord quality.
Creating Chord Diagrams in Open D
Open D tuning is:
- D
- A
- D
- F#
- A
- D
The open strings form D major.
A full barre creates movable major chords.
For example:
- Open: D
- Second fret: E
- Third fret: F
- Fifth fret: G
- Seventh fret: A
Minor Chords in Open D
Because the open tuning contains a major third, minor chords often require changing or avoiding the F# string.
A minor voicing may need:
- F natural instead of F#
- The third string muted
- A partial barre
- A custom fingering
This is a good example of why each string must be marked accurately.
Creating Diagrams for Half-Step-Down Tuning
Half-step-down tuning is:
- Eb
- Ab
- Db
- Gb
- Bb
- Eb
The visual chord shapes remain the same as standard tuning, but every chord sounds one semitone lower.
For example:
- E shape sounds as Eb
- A shape sounds as Ab
- G shape sounds as Gb
- D shape sounds as Db
A diagram may show:
- Shape name
- Sounding chord
- Tuning
Decide whether the main chord label should represent the shape or actual sound.
For ensemble and publishing purposes, the sounding chord is usually more useful.
Creating Diagrams for Full-Step-Down Tuning
Full-step-down tuning lowers every string by two semitones:
- D
- G
- C
- F
- A
- D
Standard shapes sound one whole step lower.
For example:
- E shape sounds as D
- G shape sounds as F
- C shape sounds as Bb
- A shape sounds as G
Automatic chord naming should reflect the sounding notes.
Using a Capo with Alternate Tunings
A capo can be used in any tuning.
For example, Open D with a capo at the second fret produces Open E pitches while maintaining the lower string tension of Open D.
When using a capo:
- Set the alternate tuning.
- Enter the capo fret.
- Build the chord shape.
- Calculate the sounding notes.
- Display both relative shape and sounding name when useful.
The order matters. The tuning is established first, and the capo raises every string from that starting point.
How to Organize Alternate-Tuning Chord Charts
A chart should clearly identify the tuning and organize related shapes.
Possible categories include:
- Open chords
- Major chords
- Minor chords
- Power chords
- Suspended chords
- Seventh chords
- Movable barres
- Song-specific voicings
- Chords by root note
With FretGlyph, you can create up to 16 diagrams in one project.
Name projects clearly, such as:
- DADGAD Chords in D
- Open G Slide Shapes
- Drop D Power Chords
- Open D Song Voicings
Alternate-Tuning Charts for Guitar Teachers
Teachers should introduce alternate tunings with clear context.
A student chart might include:
- The tuning
- A string-by-string tuning guide
- Three or four basic chords
- Root-note locations
- A short progression
- Practice instructions
- A reminder that standard chord shapes may sound different
Do not overload a beginner with too many unfamiliar shapes at once.
Alternate-Tuning Diagrams for Songwriters
Songwriters often use alternate tunings to discover new harmony.
A useful workflow is:
- Choose a tuning.
- Experiment with open strings.
- Save interesting shapes in FretGlyph.
- Listen to playback.
- Review possible chord names.
- Add manual labels when needed.
- Arrange the shapes into a progression.
- Export or save the project.
The diagram preserves the exact fingering, which may be difficult to remember later.
Alternate-Tuning Diagrams for Guitar Books
Authors should establish a consistent notation system.
Decide:
- Where tuning labels appear
- Whether chord names represent shapes or sounding harmony
- How capo information is displayed
- Whether note names or finger numbers are shown
- How open drones are marked
- Which enharmonic spellings are used
SVG export is usually the strongest choice for print because it remains sharp when resized.
Choosing Sharps or Flats
Alternate tunings may create chords that can be spelled in several ways.
For example:
- F# or Gb
- C# or Db
- G# or Ab
Choose spellings based on:
- The key
- The root note
- The progression
- The book or project’s style guide
A progression in D major will usually use F# rather than Gb.
A progression in Eb major will usually use Ab rather than G#.
Common Alternate-Tuning Diagram Mistakes
Forgetting to change the tuning
This produces incorrect playback and chord names.
Entering the strings backward
Confirm whether the interface begins with the sixth or first string.
Leaving open strings active unintentionally
Alternate tunings often contain strong drone notes that can change the chord.
Using a standard-tuning chord name
The same shape may produce different notes.
Omitting the tuning label
The diagram may be impossible to interpret correctly.
Ignoring the bass note
A lowered string may create a slash chord or inversion.
Accepting the first automatic name without review
Alternate-tuning chords often have multiple valid interpretations.
Using impractical fingerings
Test every shape on a real guitar.
Forgetting capo transposition
Playback and naming must account for the capo.
How to Check an Alternate-Tuning Diagram
Before exporting, confirm:
- The tuning is correct.
- The string order is correct.
- The capo position is correct.
- The starting fret is visible.
- Every fretted note is accurate.
- Open strings are intentional.
- Muted strings are marked.
- Barres cover the correct strings.
- The bass note is correct.
- The chord name matches the musical context.
- The fingering is playable.
- Playback sounds correct.
- The tuning is displayed with the diagram.
- The export file is clear.
This checklist is especially important for published or educational materials.
Exporting Alternate-Tuning Chord Diagrams
Choose the export format based on the project.
PNG
Use PNG for:
- Online lessons
- Websites
- Social media
- Presentations
- Digital worksheets
- Transparent graphics
JPG
Use JPG for:
- Basic image sharing
- Solid backgrounds
- Platforms that do not accept SVG
SVG
Use SVG for:
- Guitar books
- Professional printing
- Large diagrams
- Vector editing
- Scalable website graphics
FretGlyph allows users to create and export diagrams in multiple formats.
Why Use FretGlyph for Alternate Tunings?
FretGlyph is designed to support more than standard open chords.
Users can:
- Select preset tunings
- Enter custom string pitches
- Create open and fretted notes
- Mark muted strings
- Add full and partial barres
- Set a capo
- Automatically identify likely chord names
- Review alternate names
- Override chord labels
- Play the actual sounding voicing
- Organize up to 16 diagrams
- Export PNG, JPG, or SVG files
This makes it useful for guitarists working in Drop D, DADGAD, Open G, Open D, lowered tunings, and custom setups.
Start Creating Chord Diagrams in Alternate Tunings
Accurate alternate-tuning chord diagrams begin with the correct open-string pitches.
Once the tuning is set, every fret, open string, bass note, chord name, and playback pitch can be calculated properly.
Mark all open and muted strings clearly, review automatic naming carefully, and use manual overrides when the musical context requires a different label.
Always identify the tuning alongside the diagram and test the shape on a real guitar before publishing it.
Whether you are documenting a songwriting idea, creating a lesson, preparing a guitar book, or building a personal chord library, FretGlyph can help you create, hear, organize, and export alternate-tuning chord diagrams.
Visit FretGlyph to create guitar chord diagrams in alternate tunings.
Leave a Reply